RAF Holmsley South, Operations Block
Information
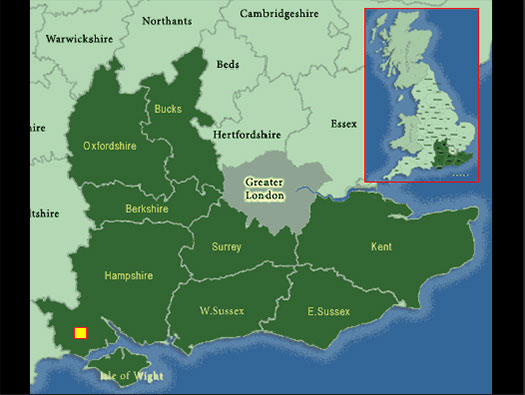
RAF Holmsley South,
Operations Block
Details
Permissible visit 11 November 2005.

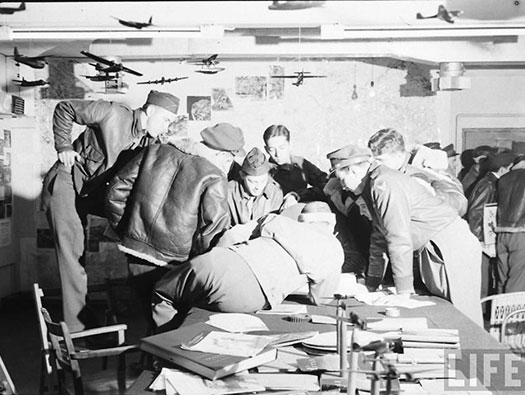
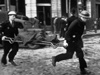
Operation OYSTER, the daylight attack on the Philips radio and valve works at Eindhoven, Holland, by No. 2 Group.

Operational planning.

Planning the route.
RAF Holmsley South, Operations Block
Information
RAF Holmsley South,
Operations Block
Details
RAF Holmsley South, Operations Block

11 November 2008
Information
RAF Holmsley South,
Operations Block
Details
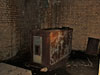
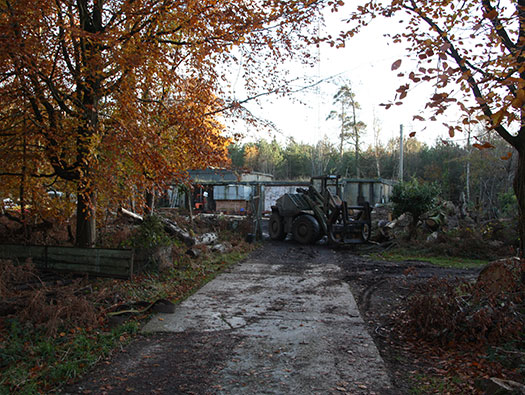
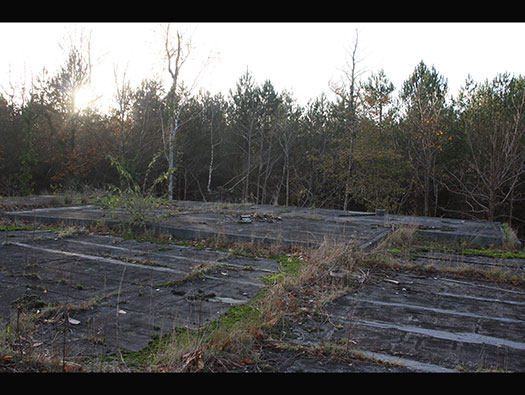
The site of the Operations Block just to the south of the airfield. These pictures were taken in 2008, a lot has been happening to the area with logging and a new barn style building erected close by. I asked permission to look around and I am pleased I did. It was very wet and dark. No windows and no lighting, very slippery. I was on my own, so rang a friend and told him where I was and what I was about to do. As I started to enter the, loggers knocked off for the day and I was totally alone in the building. Scary.

One of the first aircraft were Whitley bombers.

Liberators of Coastal Command.

USAAF Marauders were here after D-Day.
RAF Holmsley South, Operations Block

11 November 2008
Information
RAF Holmsley South,
Operations Block
Details
Site No. 2. Plan.
152 - Operations Block - TB - 2337/41.
153 - Library - N -
154 - Picket Post. - TB - 12404/41.
The Block is oblong in shape, with four entrances on each corner (there maybe more). A corridor runs right around the inside with small offices between it and the outside wall and inside the corridor is the main Ops rooms. Its a protected building, in that it has steel reinforcement to quite a thick concrete roof and brick walls. No windows at all and would have used filtered air through an air conditioning plant and the roof has a large water tank for the air conditioning. Later after the war, it was taken over as a seat of government by probably Hampshire CC. And it was up graded with later flush toilets and kitchen area. Probably a sleeping area as well. A telephone exchange, fitted so the Police chief for the area, the council officers, Red cross (or equivalent) and Civil Defence group could keep in contact. Its a period of time I lived through but do not know that much about.

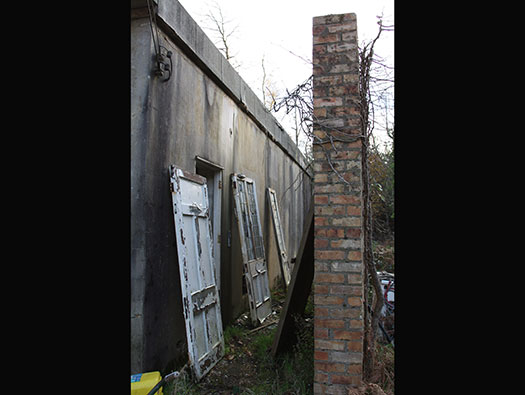
Elevation. The tall chimney is actually the fresh air inlet. Gas is heavy so the chimney protrudes above the gas could and sucks in fresh air. It is then put through a filtration system and also an air conditioning plant.

Chimney as this would have looked like.
Part of a heating plant that may have been here.
RAF Holmsley South, Operations Block
Google
Information
RAF Holmsley South,
Operations Block
Details
The RAF entrance.

Humber Staff car.

Hillman.

US Jeep.
RAF Holmsley South, Operations Block
13 January 2008
Information
RAF Holmsley South,
Operations Block
Details
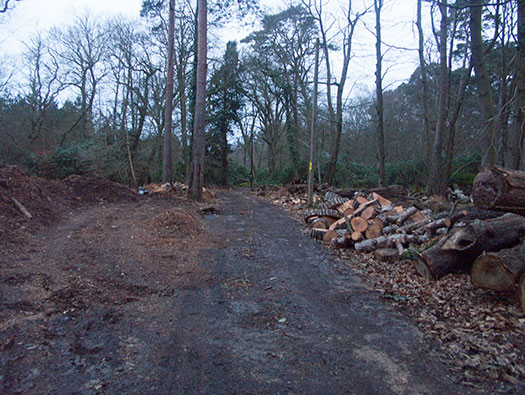
The roadway in.
RAF Holmsley South, Operations Block
11 November 2008
Information
RAF Holmsley South,
Operations Block
Details
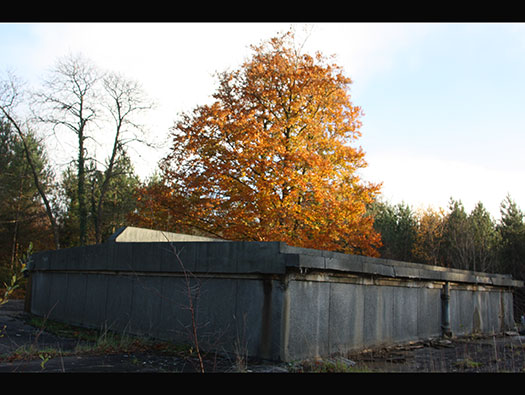
Very well hidden in the trees, it would have been camouflaged in some way as well.

It can be seen from this air photo. The long thin building is the Nissen hut.
Very hard to see in this low level picture.
RAF Holmsley South, Operations Block
11 November 2008
Information
RAF Holmsley South,
Operations Block
Details
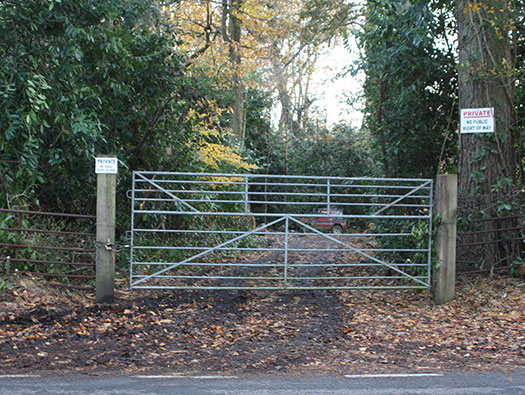
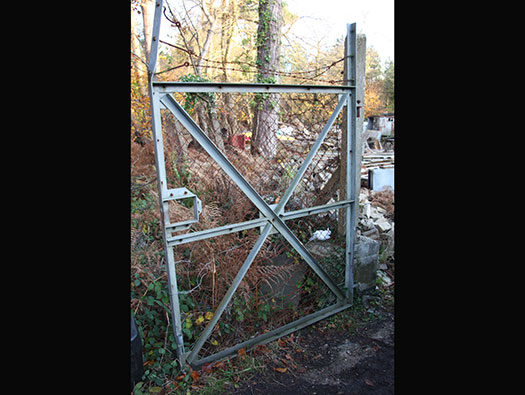
The gate is styled on a Ministry design but is galvanised, which possibly makes it post war military/government.
RAF Holmsley South, Operations Block

Picket Post 8218/40 not here
Information
RAF Holmsley South,
Operations Block
Details
154 - Picket Post. - TB - 12404/41.
Unfortunately I do not have a picture of a 12404/41, but this is an 8218/40 probably not dissimilar. Here you would be stopped by a Service Policeman and show your pass to be allowed inside.
RAF Holmsley South, Operations Block
RAF 24ft Nissen Hut ------------------------------- Americans in their library
Information
RAF Holmsley South,
Operations Block
Details
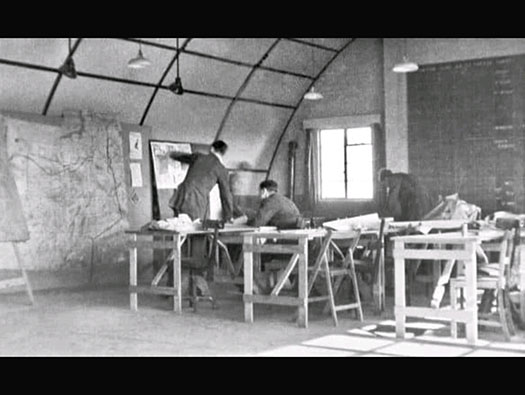
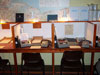
153 - Library a Nissen hut, 24ft wide and quite long.
It would have been for maps, plans, aircraft recognition models, etc. Everything that a pilot & crew could use to help them. The second photo is an American squadron studying plans with model aircraft above.
RAF Holmsley South, Operations Block
11 November 2008
Information
RAF Holmsley South,
Operations Block
Details
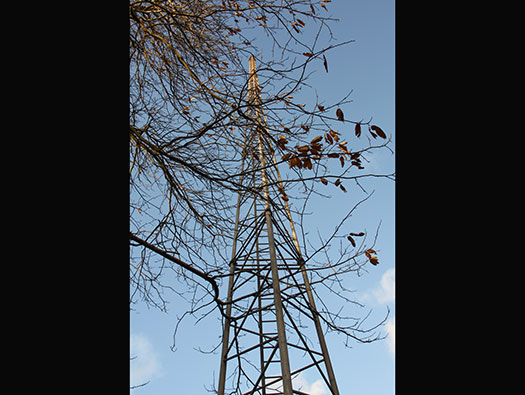
This is the Cold War I think Police or local Government aerial. For more information go to Subbrit.org.uk.
RAF Holmsley South, Operations Block
11 November 2008
Information
RAF Holmsley South,
Operations Block
Details
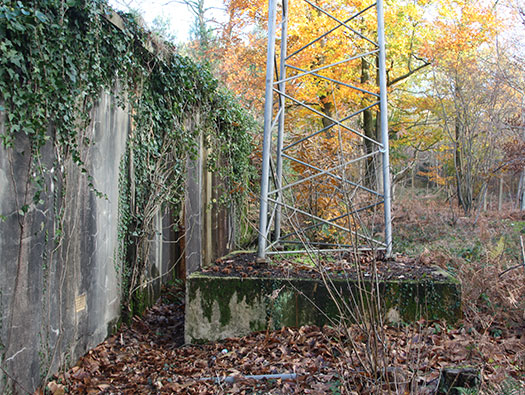
Base of the aerial.
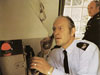
Police emergency response, pressing the alarm.

Cold war siren.
RAF Holmsley South, Operations Block

11 November 2008
Information
RAF Holmsley South,
Operations Block
Details
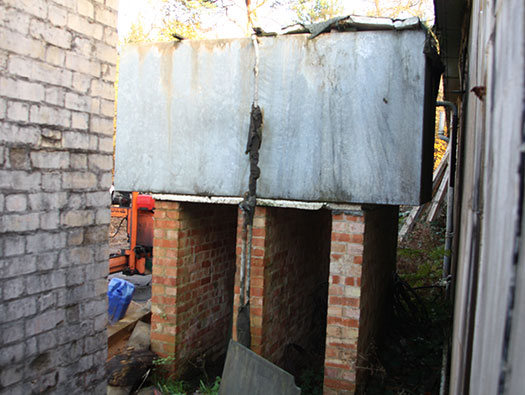
The front of the Block. Now I may have said, four entrances, the whitish painted wall in front is actually a blast wall for another entrance, so there may have been more than I originally thought. The small water tanks could be Cold war period. The large brick structure on the roof is the original water tank,
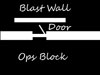
Layout of the door.
Elevation.

Plan
RAF Holmsley South, Operations Block
11 November 2008
Information
RAF Holmsley South,
Operations Block
Details
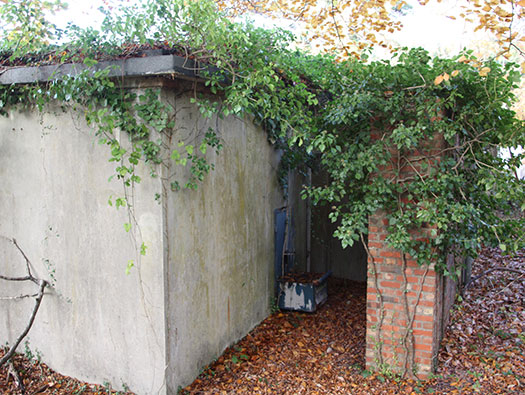
Side entrance with its blast wall.
RAF Holmsley South, Operations Block
11 November 2008
Information
RAF Holmsley South,
Operations Block
Details
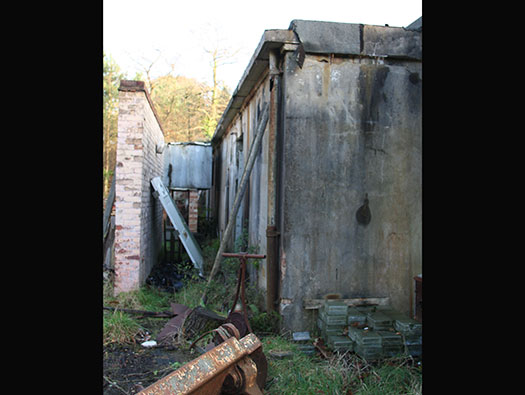
Another corner entrance and blast wall.
RAF Holmsley South, Operations Block
11 November 2008
Information
RAF Holmsley South,
Operations Block
Details
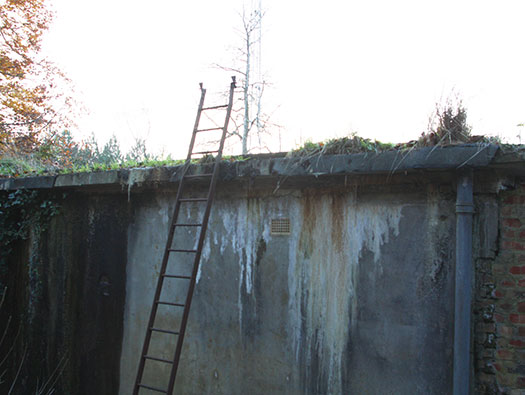
I was looking through these pictures and wondered how I got on the roof, later I found this photo.
RAF Holmsley South, Operations Block
11 November 2008
Information
RAF Holmsley South,
Operations Block
Details
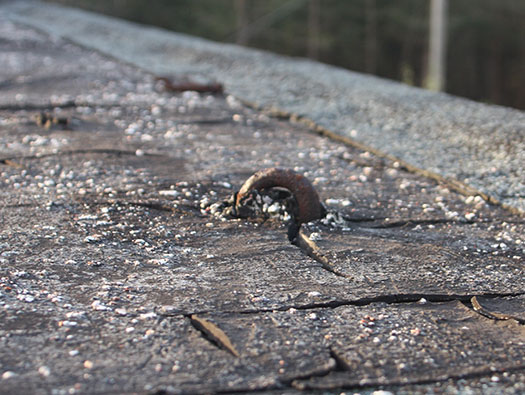
The flat roof, full of age damage and leaks like a sieve.
RAF Holmsley South, Operations Block
11 November 2008
Information
RAF Holmsley South,
Operations Block
Details
The water reservoir for the wartime air conditioning plant.
Heating plant room.
RAF Holmsley South, Operations Block
11 November 2008
Information
RAF Holmsley South,
Operations Block
Details
These hooks could be for an aerial guy rope or for a camouflage net?

Camouflage netting.
RAF Holmsley South, Operations Block
11 November 2008
Information
RAF Holmsley South,
Operations Block
Details
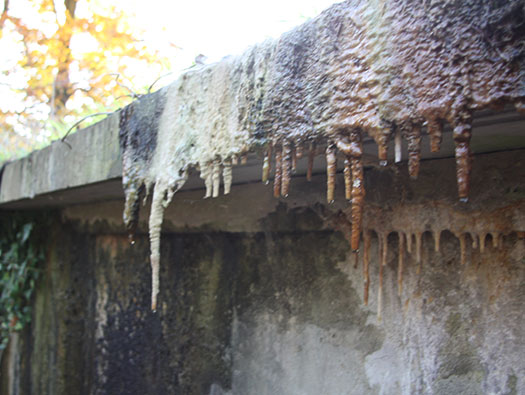
Age.
RAF Holmsley South, Operations Block
11 November 2008
Information
RAF Holmsley South,
Operations Block
Details
Post war oil fuel tank.
RAF Holmsley South, Operations Block
11 November 2008
Information
RAF Holmsley South,
Operations Block
Details
Blast wall and entrance, ignore the doors that litter the place and windows, they are nothing to do with the building.
Blast wall.
RAF Holmsley South, Operations Block

Google
Information
RAF Holmsley South,
Operations Block
Details
The plan of the block, The four entrances on the corners, the grey passageways running around, with offices on the outside and large rooms in the middle. I have NO plan of this and also it was 2008 when I visited twelve years ago, my memory is a bit dim from there. Sorry.
2337/41 basic plan.
Elevation.
RAF Holmsley South, Operations Block
11 November 2008
Information
RAF Holmsley South,
Operations Block
Details
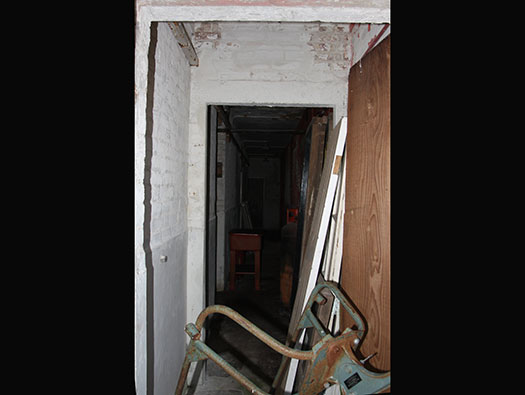
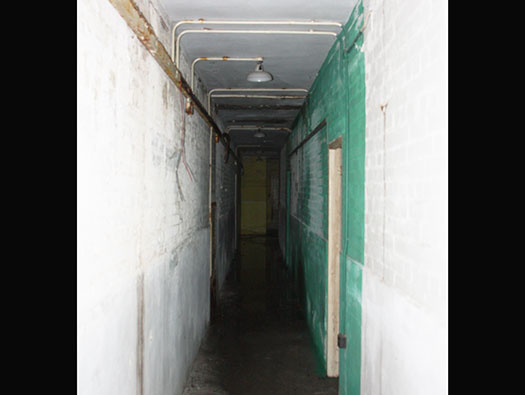
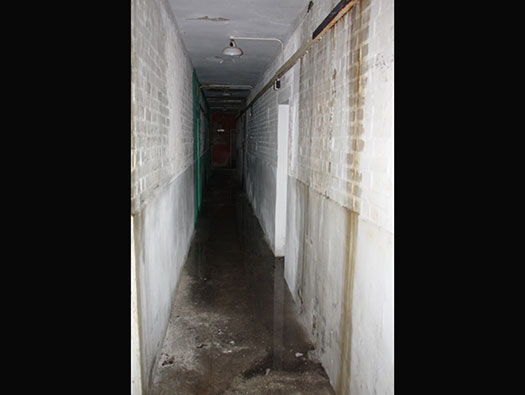
Entering the passageway that runs round the inside. As I may have said. NO lighting and no windows, so pitch black.
RAF Holmsley South, Operations Block
11 November 2008
Information
RAF Holmsley South,
Operations Block
Details
Some of the original light fittings and some are post war additions
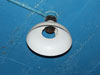
Light fitting.
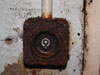
Light switch.
RAF Holmsley South, Operations Block
11 November 2008
Information
RAF Holmsley South,
Operations Block
Details
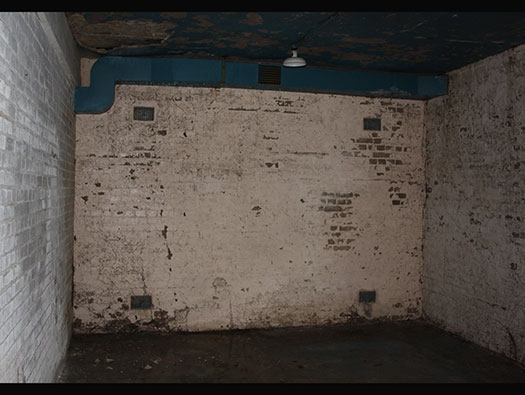
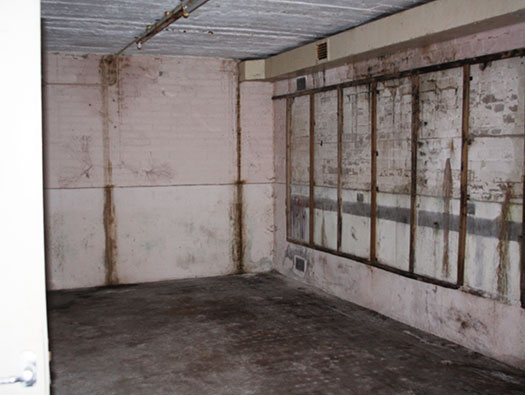
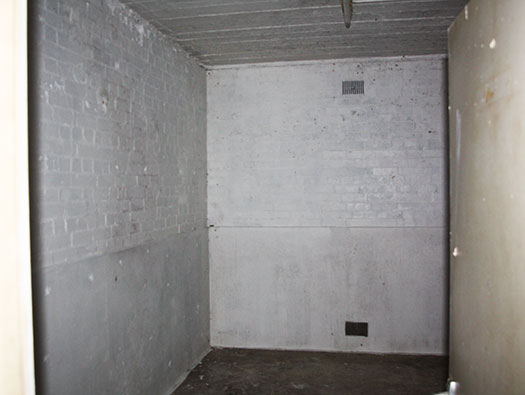
One of the rooms.
RAF Holmsley South, Operations Block

Air 20/7587
Information
RAF Holmsley South,
Operations Block
Details
Charts would line the walls.
RAF Holmsley South, Operations Block
11 November 2008
Information
RAF Holmsley South,
Operations Block
Details
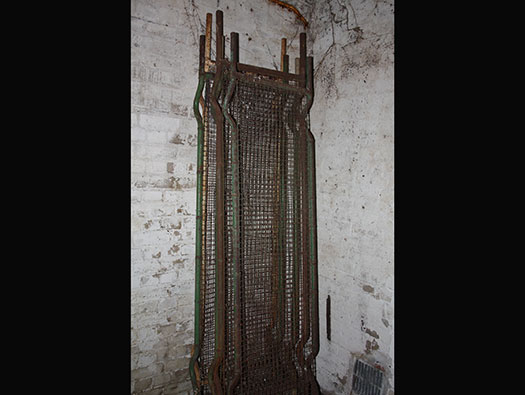
Cold war stretchers left over.

Government officials looking at the designs.
Cold Ear exorcise.
RAF Holmsley South, Operations Block
11 November 2008
Information
RAF Holmsley South,
Operations Block
Details
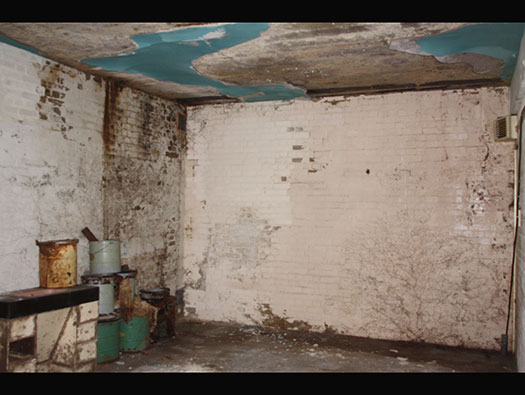
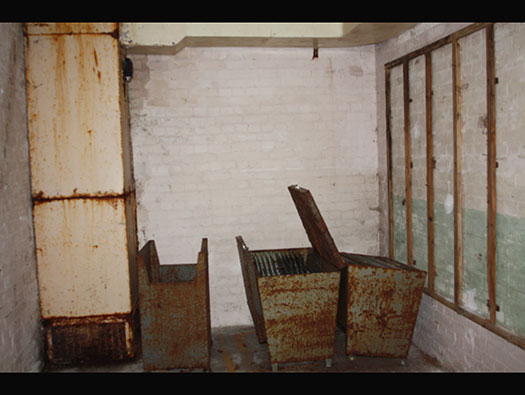
Not at all sure what room did what but this one has several Elsan toilet buckets.
RAF Holmsley South, Operations Block

11 November 2008
Information
RAF Holmsley South,
Operations Block
Details
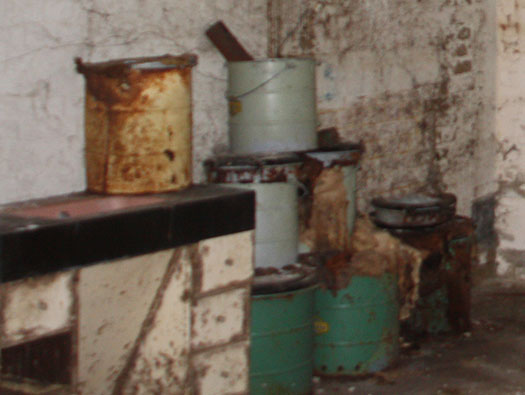
Elsan toilet buckets.
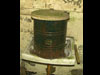
Elsan toilet

Elsan toilet in the rear of a Lancaster bomber.
RAF Holmsley South, Operations Block
11 November 2008
Information
RAF Holmsley South,
Operations Block
Details
Charts would line the walls.
RAF Holmsley South, Operations Block

Air 20/7587
Information
RAF Holmsley South,
Operations Block
Details
Charts would line the walls.
RAF Holmsley South, Operations Block
11 November 2008
Information
RAF Holmsley South,
Operations Block
Details
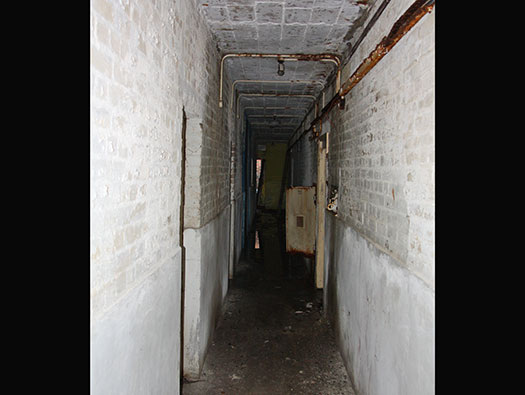
Passage continues.
RAF Holmsley South, Operations Block
11 November 2008
Information
RAF Holmsley South,
Operations Block
Details
More wall boards and air conditioning pipes running through. The long florescent lights would be Cold War.
RAF Holmsley South, Operations Block
11 November 2008
Information
RAF Holmsley South,
Operations Block
Details
Cold War telephone exchange.
Essex Secret Bunker.
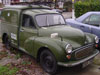
Post Office engineers van. He would have known every cold war exchange, bunker and connection.
RAF Holmsley South, Operations Block
11 November 2008
Information
RAF Holmsley South,
Operations Block
Details
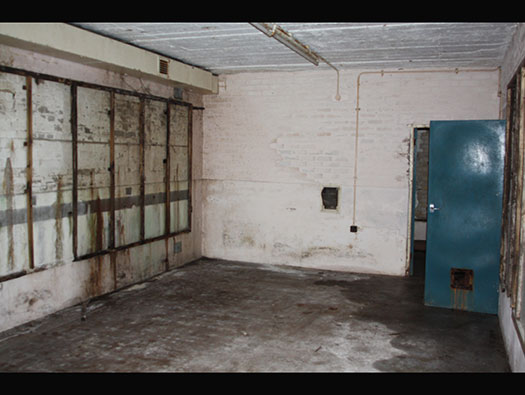
I believe this is one of the middle rooms.
More air conditioning and panels on the wall.
RAF Holmsley South, Operations Block
11 November 2008
Information
RAF Holmsley South,
Operations Block
Details
As the last picture.
RAF Holmsley South, Operations Block
11 November 2008
Information
RAF Holmsley South,
Operations Block
Details
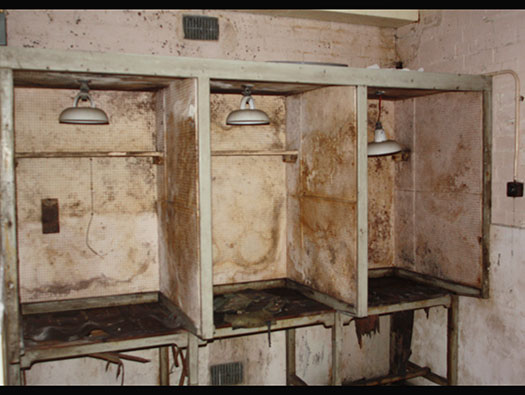
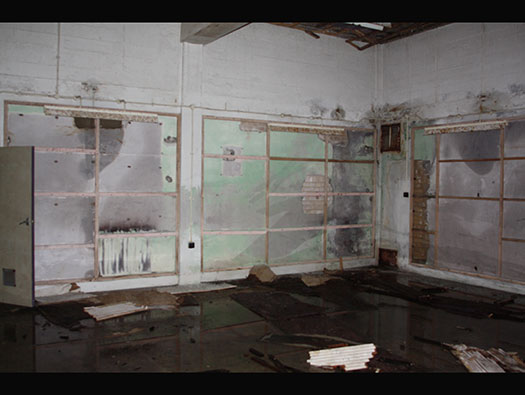
These rooms would have held briefing for pilots.
RAF Holmsley South, Operations Block
.jpg)
Air 20/7587
Information
RAF Holmsley South,
Operations Block
Details
An Operations Room (not here) on D-Day at the 385th Bomb Group, 549th Bomb Squadron USAAF.
RAF Holmsley South, Operations Block

11 November 2008
Information
RAF Holmsley South,
Operations Block
Details
Window to the next room but not outside.
RAF Holmsley South, Operations Block
11 November 2008
Information
RAF Holmsley South,
Operations Block
Details
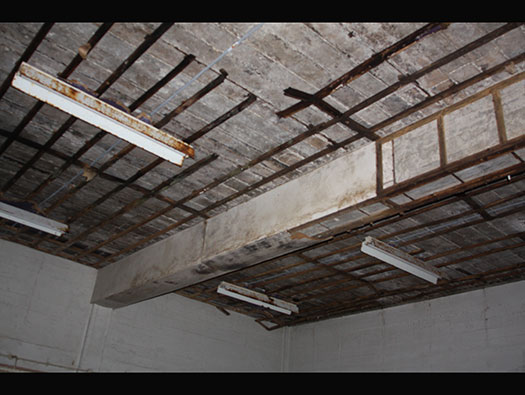
The heavy reinforced concrete roof.
Planning for the movement of Horsa Gliders to North Africa in 1943 would have taken place here. They started by flying a combination (Horsa & tug Halifax) all around Britain 1,400mls and took 10hrs. To prove that it could be done. When it was proved, then the operation went ahead. The code name was "Turkey Buzzard".

Halifax Horsa combination.
Horsa Glider.

Pilots view.
RAF Holmsley South, Operations Block
Air 20/7587
Information
RAF Holmsley South,
Operations Block
Details
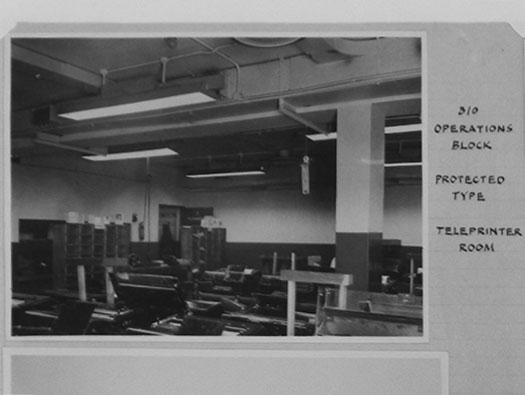
Protected Teleprinter room looks very like the last picture..
RAF Holmsley South, Operations Block
11 November 2008
Information
RAF Holmsley South,
Operations Block
Details
Cupboard off one of the main rooms with what look like steel filing cabinets for large plans. The left side is air conditioning system.

1939 air map.

East Anglia.

Dorchester.
RAF Holmsley South, Operations Block

11 November 2008
Information
RAF Holmsley South,
Operations Block
Details
One of the semi-armoured doors.
RAF Holmsley South, Operations Block
11 November 2008
Information
RAF Holmsley South,
Operations Block
Details
About an inch of water nearly all over the floor.
RAF Holmsley South, Operations Block
11 November 2008
Information
RAF Holmsley South,
Operations Block
Details
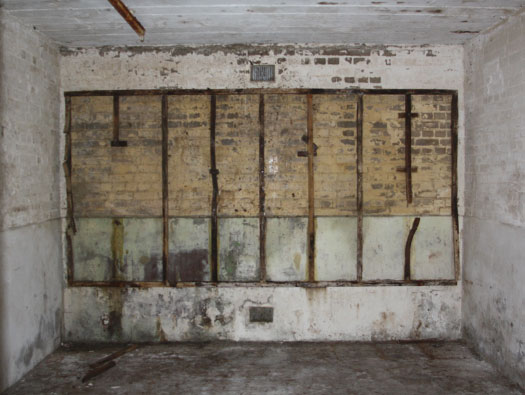
Another of the outer rooms.

Route board.
RAF Holmsley South, Operations Block
Air 20/7587
Information
RAF Holmsley South,
Operations Block
Details
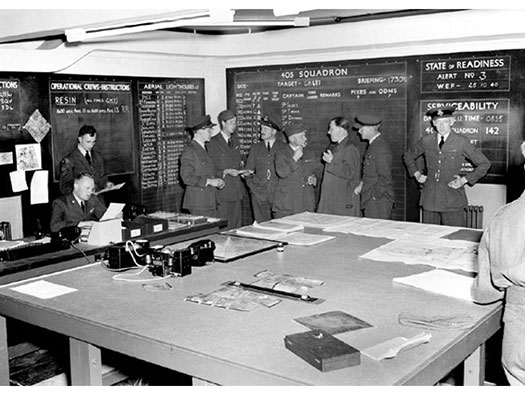
RCAF Ops Room No.405 Sqn around 1941.
RAF Holmsley South, Operations Block
11 November 2008
Information
RAF Holmsley South,
Operations Block
Details
Imagine this is your office.
RAF Holmsley South, Operations Block

Air 20/7587
Information
RAF Holmsley South,
Operations Block
Details
WAAF planners.

WAAF´s.
RAF Holmsley South, Operations Block

11 November 2008
Information
RAF Holmsley South,
Operations Block
Details
Along one side.
RAF Holmsley South, Operations Block

11 November 2008
Information
RAF Holmsley South,
Operations Block
Details
Dog leg in the corner.
RAF Holmsley South, Operations Block

11 November 2008
Information
RAF Holmsley South,
Operations Block
Details
Wall lit panels, Cold War.

The bomb.

NATO.

East & West Germany.
RAF Holmsley South, Operations Block

11 November 2008
Information
RAF Holmsley South,
Operations Block
Details
Up dated toilets.
RAF Holmsley South, Operations Block

11 November 2008
Information
RAF Holmsley South,
Operations Block
Details
Urinals.
RAF Holmsley South, Operations Block

11 November 2008
Information
RAF Holmsley South,
Operations Block
Details
This could be the telephone connection room.

Telephone exchange RAF Talbenny, Wales.
Essex Secret Bunker.
RAF Holmsley South, Operations Block

11 November 2008
Information
RAF Holmsley South,
Operations Block
Details
Up graded kitchen Cold War.
RAF Holmsley South, Operations Block
11 November 2008
Information
RAF Holmsley South,
Operations Block
Details
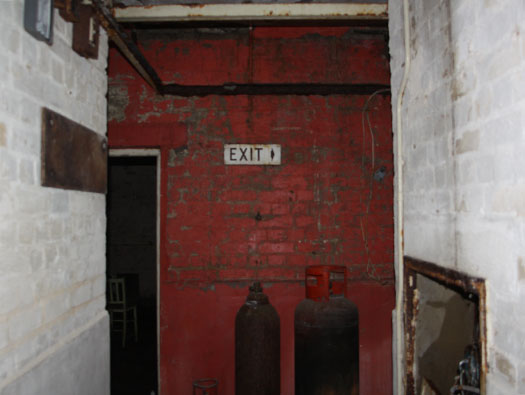
Well has to be Way Out.
RAF Holmsley South, Operations Block

11 November 2008
Information
RAF Holmsley South,
Operations Block
Details
Cold War.
RAF Holmsley South, Operations Block

11 November 2008
Information
RAF Holmsley South,
Operations Block
Details
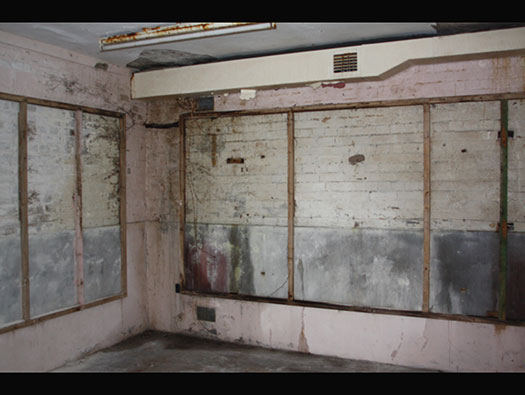
Another room in the centre a much larger room. The office behind has steps up and a senior officer can sit at the window looking down on a map table.
details

details

Teleprinter room. A lot of information was sent via teleprinter. That way radio was not used and harder for an enemy to break your radio codes.
RAF Holmsley South, Operations Block

11 November 2008
Information
RAF Holmsley South,
Operations Block
Details
Another part with steps up like a stage.
RAF Holmsley South, Operations Block

11 November 2008
Information
RAF Holmsley South,
Operations Block
Details
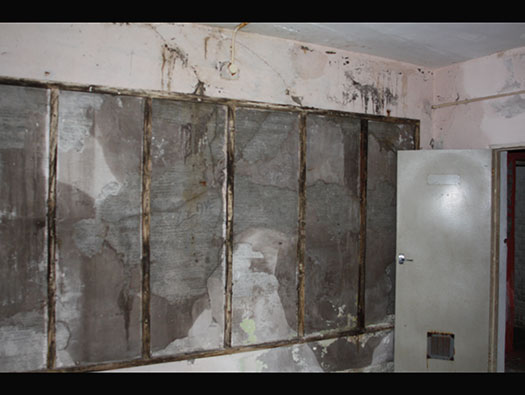
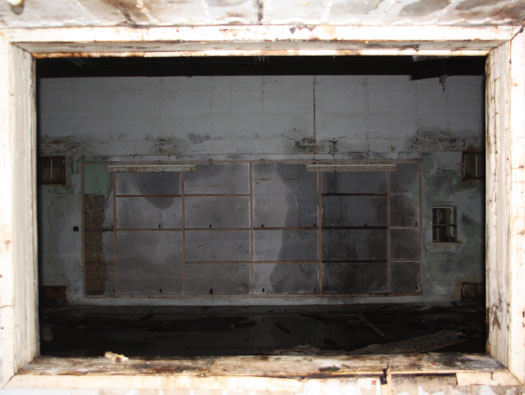
Looking into this space and another very large window from another room.
RAF Holmsley South, Operations Block
11 November 2008
Information
RAF Holmsley South,
Operations Block
Details
This is looking through that window.
Route map.
RAF Holmsley South, Operations Block

11 November 2008
Information
RAF Holmsley South,
Operations Block
Details
Well thats it and outside basking in a lovely Autumn evening after a very wet day.
RAF Holmsley South, Operations Block

11 November 2008
Information
RAF Holmsley South,
Operations Block
Details
RAF Holmsley South MENU page
 Norway (coming soon!)
 France
 Great Britain


.jpg)


